How to Create a CP Pool
This comprehensive guide walks you through the process of creating a Counterparty (CP) Pool on the Defactor platform, enabling you to launch decentralized investment opportunities with tokenized asset collateral.
Overview
Creating a CP Pool involves:
- Accessing the pool creation interface
- Configuring pool parameters (funding, timeline, returns)
- Selecting and approving collateral tokens
- Paying the creation fee
- Deploying the pool on-chain
Requirements:
- Connected wallet with sufficient USDC for the 200 USDC creation fee
- Tokenized assets to use as collateral (optional but recommended)
- Clear understanding of your pool's investment thesis and terms
Step 1: Access CP Pool Creation
There are multiple entry points to create a new pool:
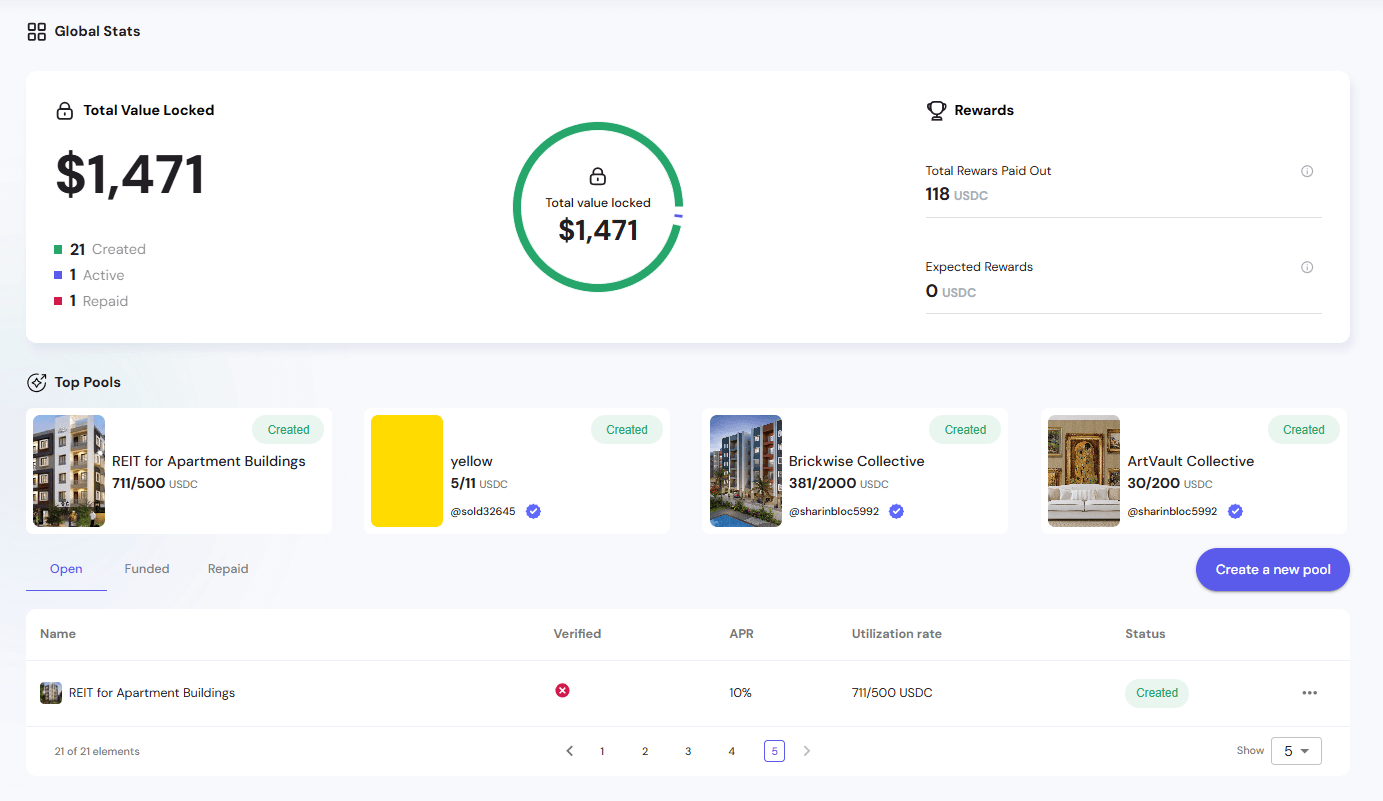
Option A: From the Dashboard

- Navigate to the CP Pools section from the main menu
- Click the "Create a new pool" button in the top navigation area
Option B: From Empty State
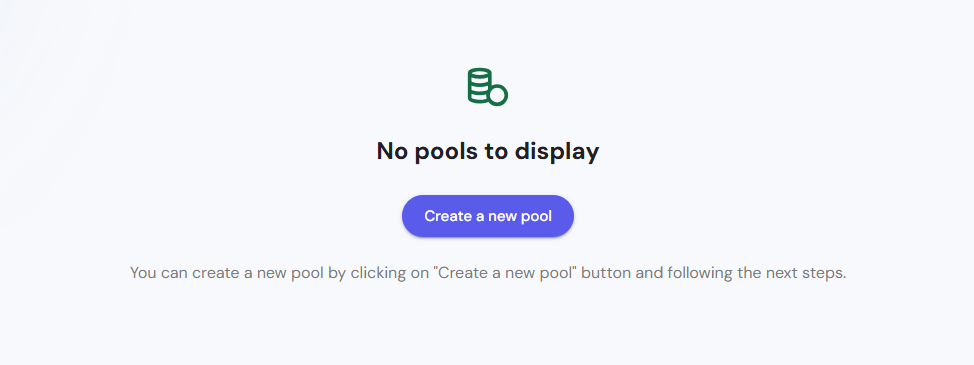
If you haven't created any pools yet:
- Navigate to My Pools section
- You'll see an empty state message: "Pools that you have created will be shown here"
- Click the "Create a new pool" button
Both options open the same pool creation form.
Step 2: Configure Pool Parameters
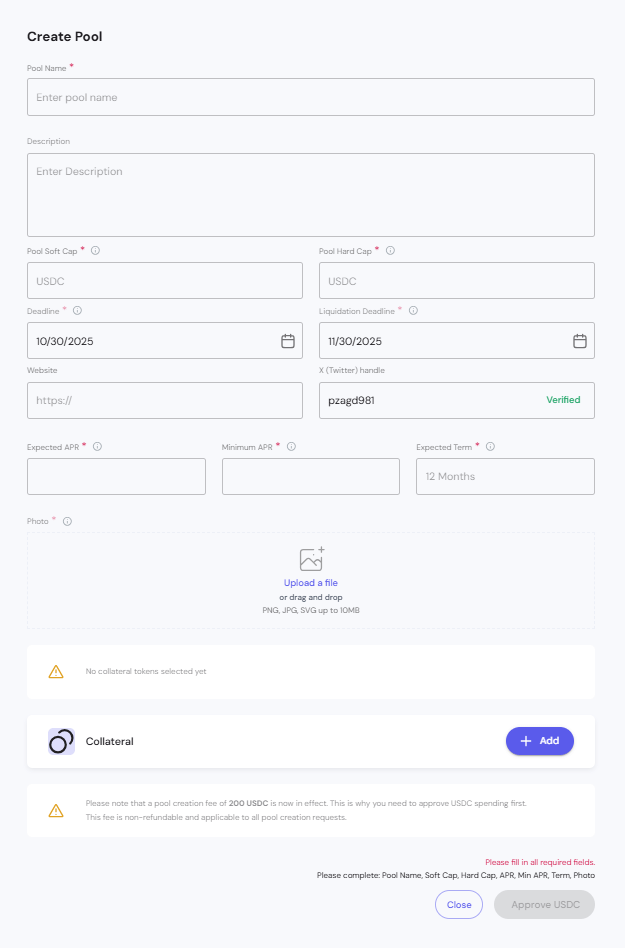
The pool creation form is organized into several sections. All fields marked with an asterisk (*) are required.
Basic Information
1. Pool Name *

Enter a clear, descriptive name that identifies your pool's purpose.
Best Practices:
- Keep it concise but informative
- Include the asset type or investment focus
- Examples: "AgroFuture Growth Pool", "Real Estate Development Fund", "Tech Startup Loan Pool"
2. Description

Provide detailed information about your pool:
- Investment thesis – What will the funds be used for?
- Target market – Who is this investment for?
- Risk factors – What are the potential risks?
- Expected outcomes – What results do you anticipate?
Example:
This pool finances sustainable agriculture projects in emerging markets. Funds will be used to purchase equipment and seeds for small farmers, with repayment expected after harvest season. Historical default rate: 2%.
Funding Parameters
3. Pool Soft Cap * and Pool Hard Cap *

Define the minimum and maximum funding targets:
-
Soft Cap (Min USDC) – Minimum amount needed for the pool to activate
- If this amount is not reached by the deadline, the pool fails
- All investor funds are returned in full
-
Hard Cap (Max USDC) – Maximum amount the pool can accept
- Once reached, no more deposits are accepted
- Pool can be collected even if deadline hasn't passed
Planning Tips:
- Set Soft Cap at the minimum viable amount for your project
- Set Hard Cap at the optimal funding level
- Consider platform liquidity when setting targets
- Start conservatively if this is your first pool
Example:
- Soft Cap: 1,000 USDC (minimum to proceed)
- Hard Cap: 5,000 USDC (optimal funding)
Timeline Configuration
4. Deadline * and Liquidation Deadline *

Set critical dates for your pool lifecycle:
-
Pool Deadline – Last date to accept investor deposits
- Choose a date that gives adequate time for funding
- Pool status changes after this date if soft cap not met
-
Liquidation Deadline – Final date for repayment
- By this date, you must deposit Principal + Rewards
- If minimum APR not met by this date, collateral liquidation begins
- Should align with your business cycle/project timeline
Planning Tips:
- Pool Deadline: 7-30 days typically (depending on pool size)
- Liquidation Deadline: Must be after Pool Deadline + your project duration
- Build in buffer time for unexpected delays
- Consider seasonal factors if relevant to your business
Example:
- Pool Deadline: December 15, 2025 (30 days to raise funds)
- Liquidation Deadline: June 15, 2026 (6 months for project + repayment)
Returns Configuration
5. Expected APR *, Minimum APR *, and Expected Term *

Define the return structure for investors:
-
Expected APR – The target annual percentage rate you plan to deliver
- This is your goal and attracts investors
- Should be realistic based on your business model
-
Minimum APR – The lowest acceptable return rate
- Critical threshold that protects investors
- If you fail to meet this, collateral enters liquidation
- Typically set 30-50% below Expected APR
-
Expected Term – Duration of the investment in months
- How long until you expect to repay
- Used to calculate total returns
Formula for Total Repayment:
Total Repayment = Principal × (1 + (APR × Term / 12))
Example Calculation:
- Principal: 5,000 USDC
- Expected APR: 18%
- Minimum APR: 12%
- Expected Term: 6 months
Expected Repayment: 5,000 × (1 + 0.18 × 6/12) = 5,450 USDC
Minimum Acceptable: 5,000 × (1 + 0.12 × 6/12) = 5,300 USDC
If you deposit less than 5,300 USDC by the Liquidation Deadline, collateral liquidation triggers.
Risk Assessment:
- Higher APR attracts more investors but increases your obligation
- Set Minimum APR at a level you're confident you can meet
- Consider your historical performance and market conditions
External Links
6. Website

Add a link to your project or company website:
- Provides credibility and transparency
- Allows investors to research your business
- Include full URL:
https://yourproject.com
7. X (Twitter) Handle
Provide your verified Twitter/X handle:
- Format:
@yourhandleor justyourhandle - Helps build trust with potential investors
- Enables community engagement
Visual Identity
8. Pool Image *

Upload an image that represents your pool:
Requirements:
- Format: PNG, JPG, or SVG
- Max size: 10MB
- Recommended: Square aspect ratio (1:1)
Best Practices:
- Use high-quality, professional images
- Avoid copyrighted content
- Consider using your company logo or project visualization
- Ensure image clearly displays at small sizes
Step 3: Add Collateral

Collateral is the security backing your pool. It protects investors if you fail to meet repayment obligations.
Why Collateral Matters
- Investor Protection – Provides security if you default
- Trust Building – Shows you're committed to repayment
- Risk Mitigation – Reduces investor risk exposure
- Platform Requirement – Many pools require collateral
Collateral Selection Process
Step 3.1: Click "+ Add" Button
Click the + Add button in the Collateral section to open the token selection modal.
Step 3.2: Choose Collateral Tokens
The collateral selection modal displays your available tokenized assets:
Table Columns:
- Checkbox – Select tokens to use as collateral
- Name – Full token name
- Symbol – Token ticker
- Token ID – Unique identifier
- Type – Token standard (ERC20, ERC721, ERC1155)
- Balance – How many tokens you own
Selection Guidelines:
- You can select multiple tokens as collateral
- Total collateral value should reasonably cover the Hard Cap + Expected Rewards
- Consider token liquidity and market value
- Mix of token types (fungible + NFTs) can diversify security
Actions:
- Select tokens – Check boxes next to tokens you want to include
- Add Collateral – Confirm your selection
- Cancel – Exit without adding collateral
Collateral Value Considerations
Example:
- Hard Cap: 5,000 USDC
- Expected Rewards: 450 USDC
- Total Obligation: 5,450 USDC
Your collateral should be worth at least 5,450 USDC (preferably 110-150% to account for market volatility).
Step 4: Approve USDC
Before creating the pool, you must approve the platform to charge the 200 USDC creation fee.
Fee Information
- Amount: 200 USDC (non-refundable)
- Purpose: Platform fee to cover gas costs and maintain the ecosystem
- Requirement: You must have at least 200 USDC in your wallet
Approval Process
- Click "Approve USDC" button
- Your wallet (MetaMask, Rainbow, etc.) opens with an approval request
- Review the transaction:
- Spending cap: 200 USDC
- Spender: CP Pools smart contract
- Network fee (gas)
- Confirm approval in your wallet
- Wait for confirmation (usually 10-30 seconds)
After approval completes:
- ✅ "Approve USDC" button becomes inactive or disappears
- ✅ "Create Pool" button becomes enabled
- The form is now ready for final submission
Step 5: Create the Pool
Once all requirements are met:
- ✅ All required fields filled
- ✅ Collateral tokens selected and approved
- ✅ USDC fee approved
- ✅ Create Pool button is now active (blue)
Final Submission
-
Review all parameters one last time:
- Pool name and description
- Funding caps (Soft Cap, Hard Cap)
- Deadlines (Pool Deadline, Liquidation Deadline)
- Returns (Expected APR, Minimum APR, Term)
- Collateral tokens
- Pool image
-
Click "Create Pool" button
-
Wallet confirmation opens:
- Transaction type: Create CP Pool
- Network fee (gas cost)
- Contract interaction details
-
Confirm transaction in your wallet
-
Wait for blockchain confirmation:
- Status: "Creating pool..."
- Transaction processing (30 seconds - 2 minutes)
- Block confirmation
-
Success notification:
- ✅ "Pool created successfully!"
- You'll be redirected to the Pool Details page or My Pools section
Step 6: After Pool Creation
Once your pool is successfully created:
Immediate Status
- Pool Status: Created (green badge)
- Visible to investors: Yes, appears in the Supplied section for all users
- Accepting deposits: Yes, investors can now commit funds
- Your actions available: Monitor deposits, view details, archive (if needed)
Monitoring Your Pool
Navigate to My Pools to see your created pool:
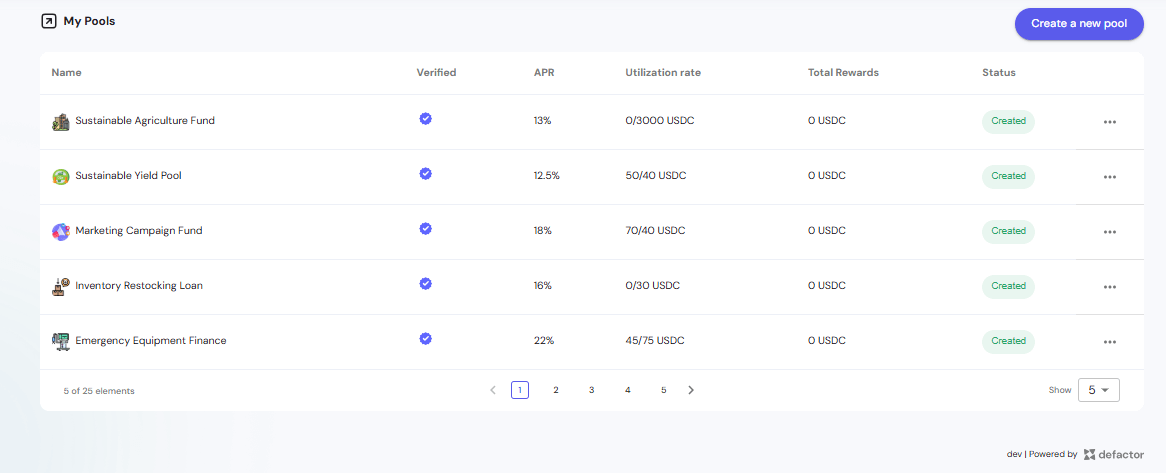
Available information:
- Current utilization rate (deposited / total committed)
- Number of investors
- Time remaining until deadline
- Status updates in real-time
Next Steps
-
Share your pool:
- Share the pool details page URL with potential investors
- Promote on your website and social media
- Use the X handle and website links you provided
-
Monitor funding progress:
- Check the utilization rate regularly
- Respond to investor questions
- Track time remaining until deadline
-
Prepare for collection:
- Once Soft Cap is reached, you can collect funds
- Plan your use of funds according to your pool description
- Prepare for repayment before Liquidation Deadline
