My Templates
The My Templates section provides users and administrators with the ability to create and manage reusable templates for asset tokenization.
Templates define the structure of assets by specifying required fields, static details, and dynamic inputs that must be provided when creating new assets.
This ensures consistency across similar assets while giving flexibility for customization where needed.
Dashboard Overview
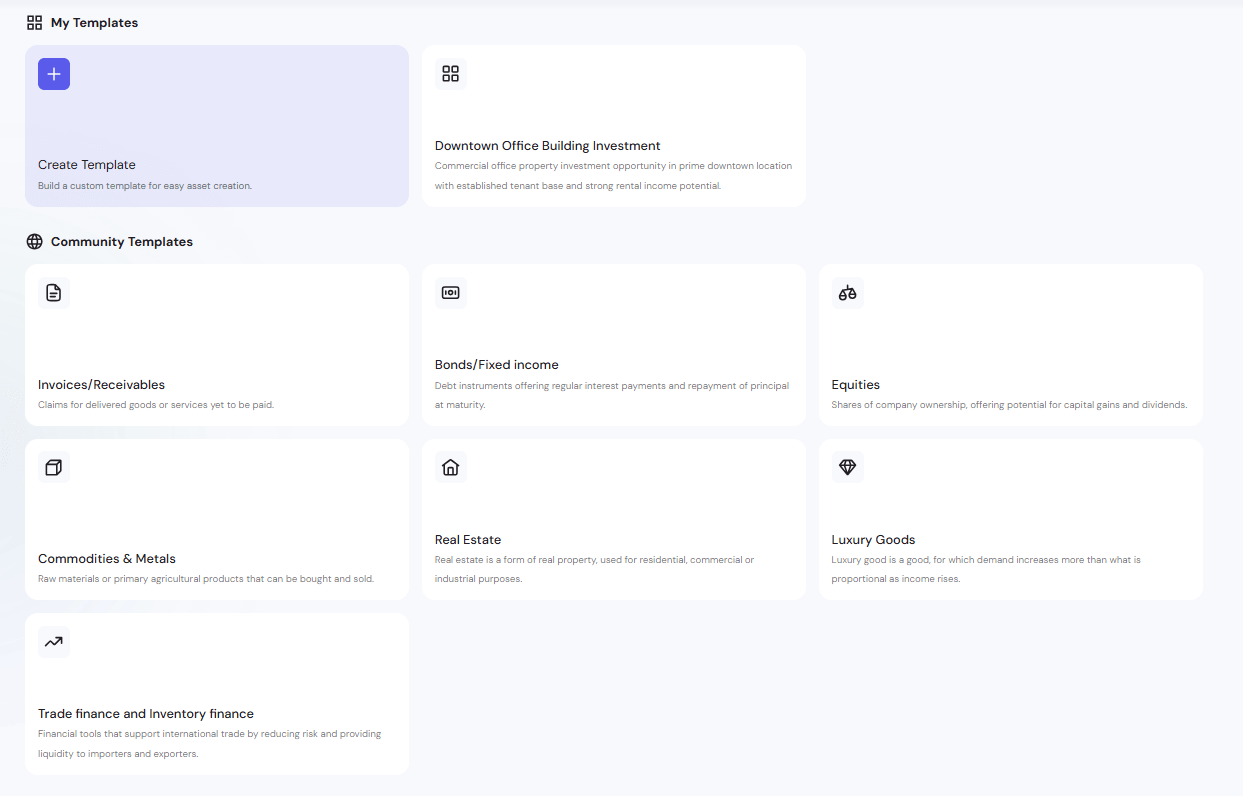
The My Templates Dashboard displays a list of all templates available to the user.
From here you can:
- Create a new template from scratch
- Use an existing template as-is
- Copy & Customize an existing template
- Edit your own templates
- Delete templates you no longer need
Creating Templates
There are three methods for creating a new template:
Method 1: Create Template from Scratch
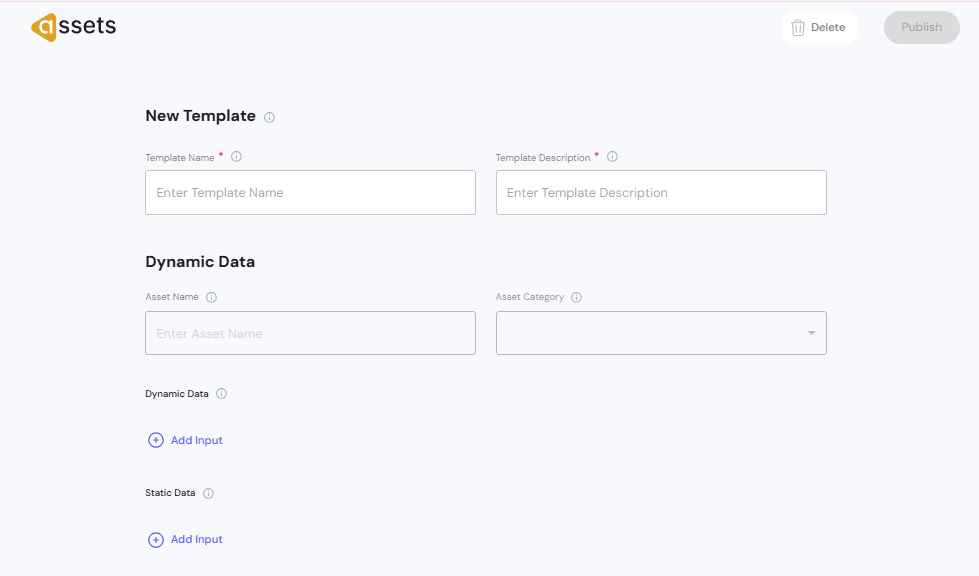
Start with a blank configuration when you want maximum flexibility.
Workflow:
- Click + in the My Templates section.

- Enter Template Name and Template Description.
- Define Dynamic Data and Static Data fields.
- Save the template to make it available for asset creation.

Method 2: Use an Existing Template
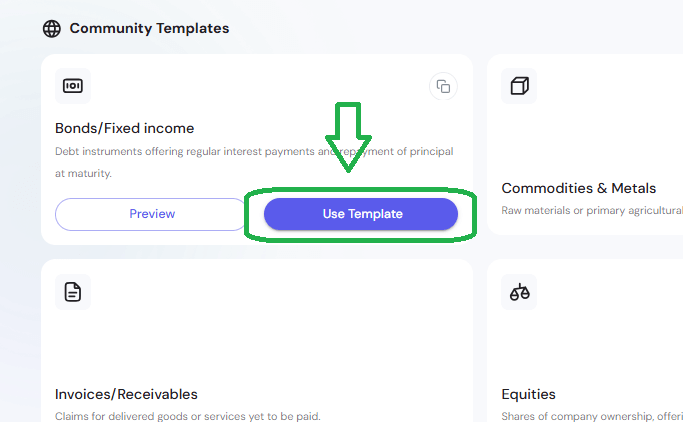
Select a pre-built template that already fits your use case.
Workflow:
- Browse available templates.
- Click Use Template to proceed directly to asset creation.
- Fill in the dynamic data required for the specific asset.
Method 3: Copy & Customize

Make a copy of an existing template and adjust it to fit your needs.
Workflow:
- Find a template similar to what you need.
- Click Copy Template.
- Open the actions menu (⋯) on the copied template.

- Select Edit and adjust fields as required.
Understanding Data Types
Each template can contain two types of fields:
-
Static Data: Fixed at the template level, unchangeable later. – Fields that are filled once when the template is created and remain fixed across all assets using that template.
- These values cannot be modified.
-
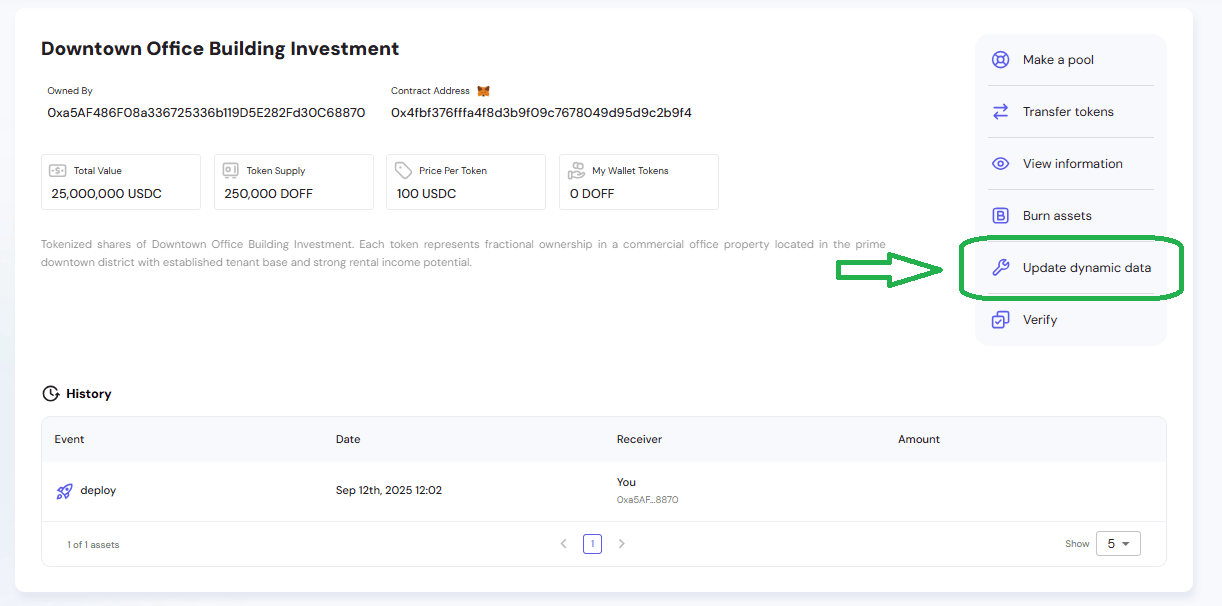
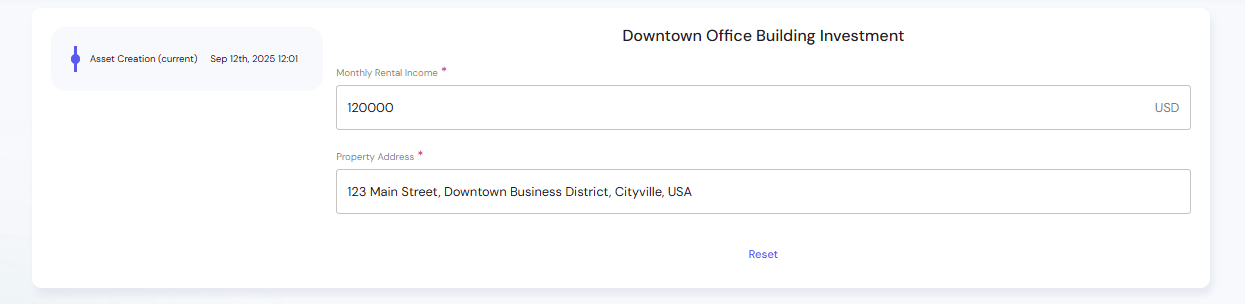
Dynamic Data: Flexible, editable per asset, and even updatable after minting.
- After an asset is minted, Dynamic Data can still be updated (for example, adjusting rental income, occupancy rates, or other changing metrics).
- The platform provides an Update Dynamic Data action to edit these values post-mint while keeping the asset’s token contract intact.
Configuring Data Fields
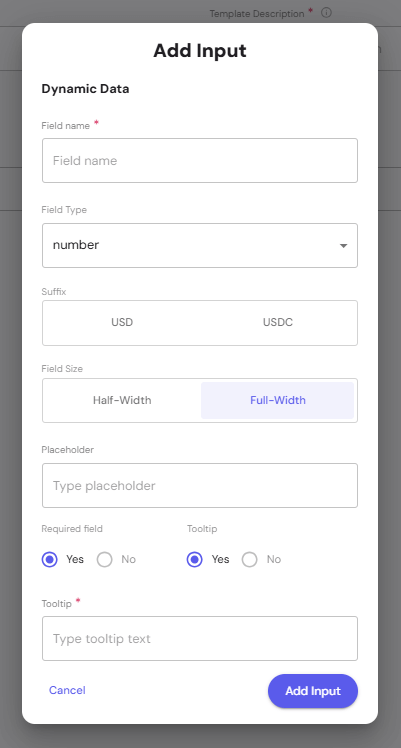
When creating or editing a template, click Add Input under either Dynamic Data or Static Data.
Field Configuration Options
- Field Name – Display label for the field.
- Field Type – Select from supported data types.

- Suffix – Optional suffix (USD, USDC).
- Field Size – Choose Half-Width or Full-Width layout.
- Placeholder – Example text shown until the field is filled.
- Required Field – Make the field mandatory or optional.
- Tooltip – Add a short help text shown on hover.
Template Lifecycle
- Create – Build from scratch, copy, or use an existing template.
- Edit – Update template fields as needed.
- Use – Select a template to start creating an asset.
- Delete – Remove unused or outdated templates.
Best Practices
- Keep templates focused – Avoid adding unnecessary fields.
- Use clear names – Make field labels easy to understand.
- Balance static vs dynamic data – Keep static fields for consistency, dynamic fields for uniqueness.
- Leverage copies – Start from a similar template to save time.
The My Templates section streamlines asset creation by providing a structured starting point, ensuring every asset follows a consistent design while leaving room for flexibility.
