How to Create an Asset
This comprehensive guide walks administrators through the process of creating assets on the Defactor platform, from initial configuration to deployment and management.
Step 1: Access Asset Creation
There are two convenient ways to access the asset creation workflow:
Option A: Dashboard Access
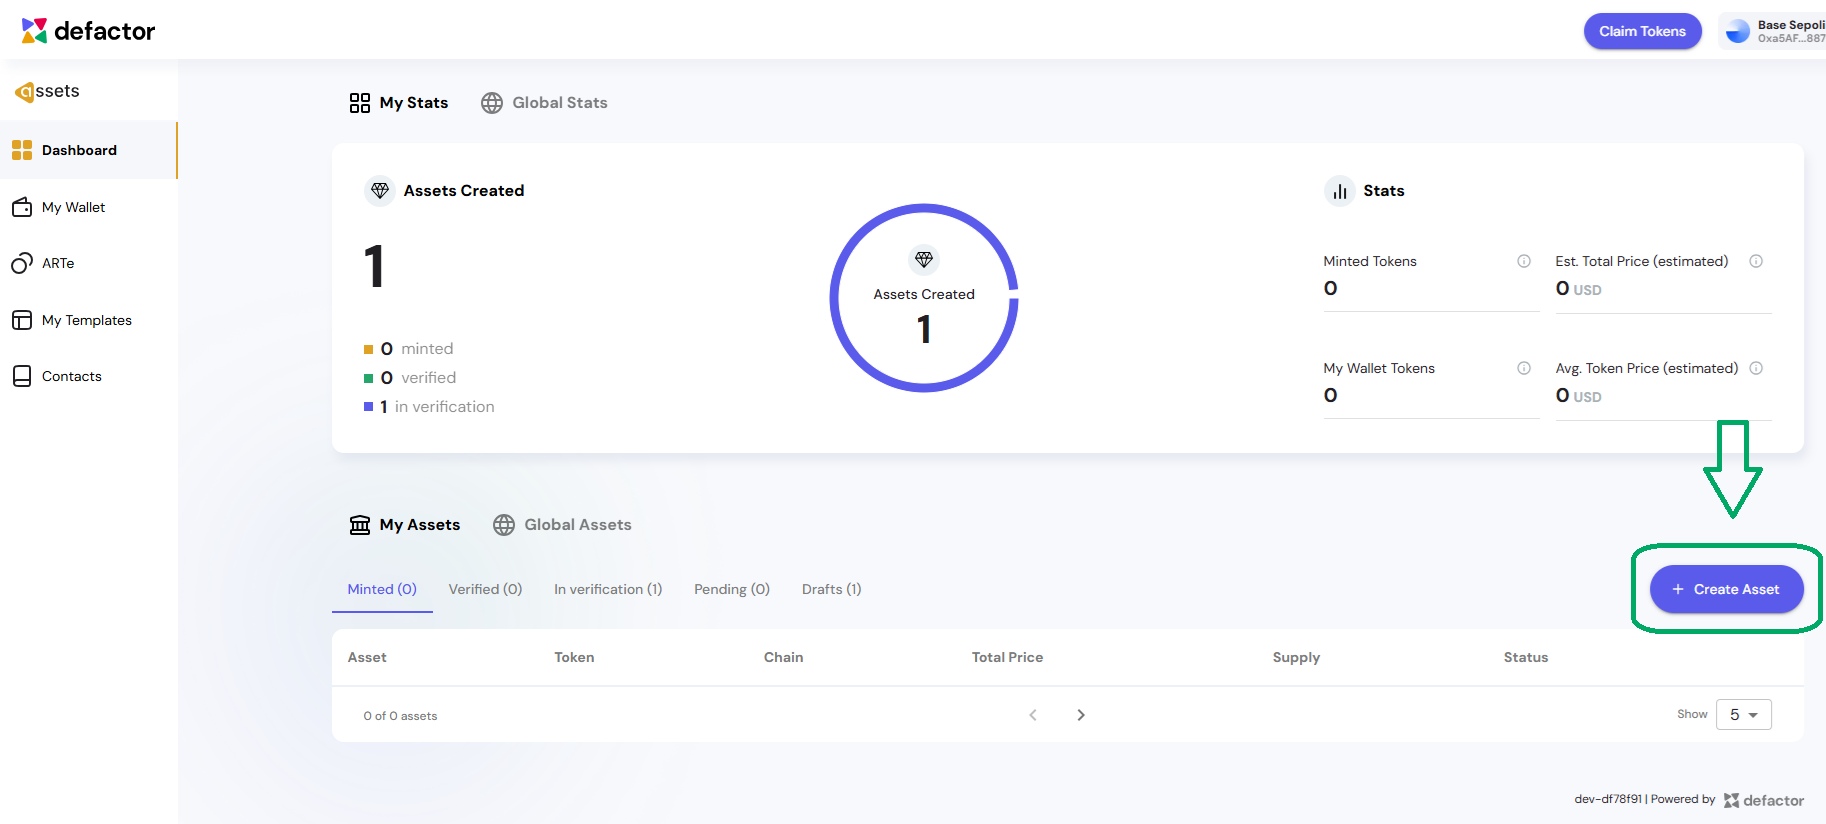
Navigate to your Assets dashboard and locate the "+ Create Assets" button prominently displayed on the interface. Clicking this button will seamlessly redirect you to the My Templates section where the asset creation process begins.
Option B: Direct Navigation
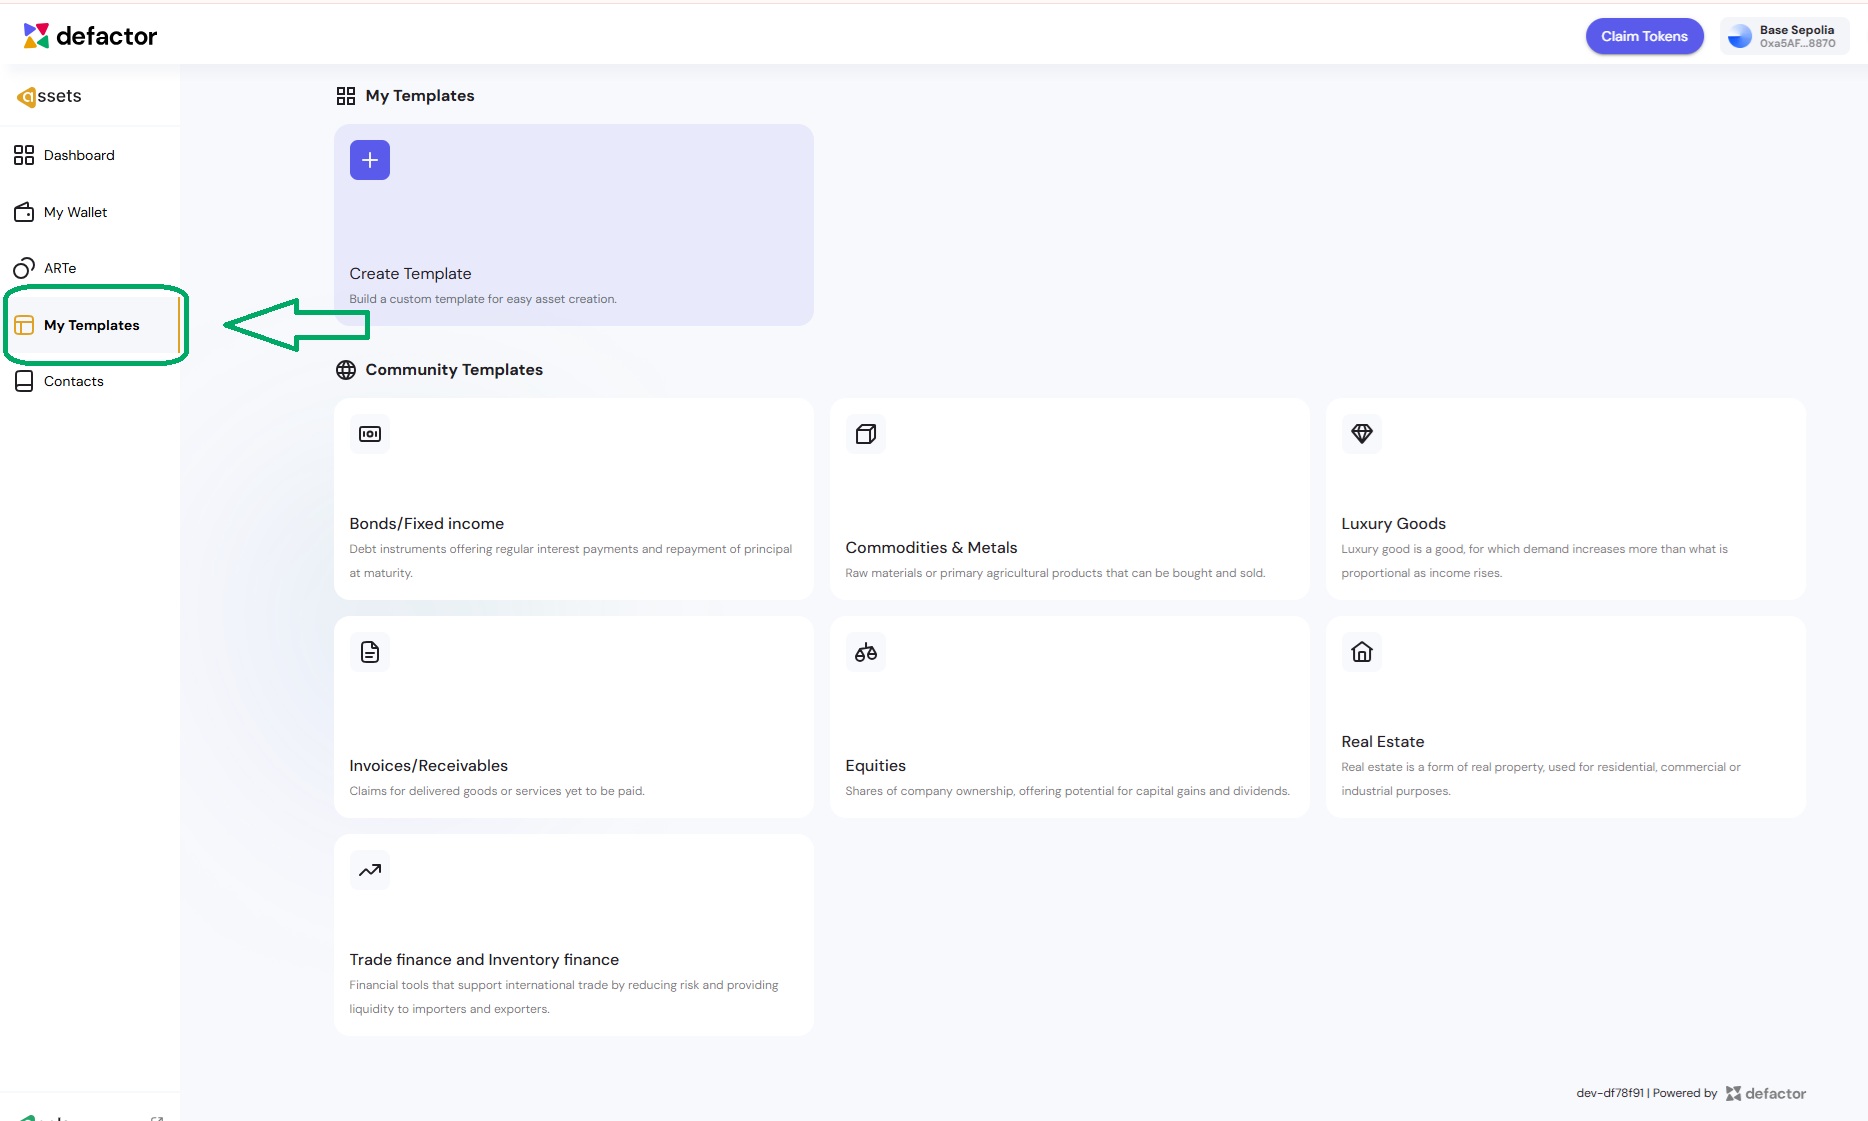
Alternatively, you can navigate directly to the My Templates section from the main menu.
Step 2: Choose Your Template Creation Method
Once you're in the My Templates section, you have three distinct approaches for creating your template:
Method 1: Create Template from Scratch

Start with a completely blank template when you need maximum flexibility and control over every aspect of your template configuration.
Workflow:
- Click the "+" button in the My Templates section
- You'll be taken directly to the template configuration interface
- Begin with empty forms for Template Name, Description, Asset Name, and Category
- Build your template structure from the ground up using Dynamic Data and Static Data sections
Method 2: Use Existing Template

Select a pre-built template that closely matches your requirements with minimal to no modifications needed.
Workflow:
- Browse the available pre-built templates in the My Templates section
- Select the template that best fits your needs
- Click "Use Template" to proceed directly to the asset creation process
- The template will be applied with its predefined structure and data fields
Method 3: Template Customization

Copy and modify an existing template to create a customized version that meets your specific needs.
Customization Workflow:
- Browse available pre-built templates in the My Templates section
- Select "Copy Template" for the template you want to modify
- Click the actions menu (⋯) next to your copied template
- Choose "Edit" to customize the template according to your specific needs

All three methods eventually lead to the Fill Data stage, where you'll use your template to create actual assets through a structured workflow that includes Fill Data, Tokenization settings, Verification (optional), and Minting phases.
Understanding Data Types
Before diving into the template creation methods, it's important to understand the two types of data fields you'll work with:
Dynamic Data - These are fields that can change or vary for each asset created from this template. Dynamic data allows flexibility and customization when creating individual assets.
Static Data - These are fixed fields that remain constant across all assets created from this template. Static data ensures consistency and contains information that doesn't change.
The key difference is that Dynamic Data creates customizable fields for asset creators to fill in differently for each asset, while Static Data creates pre-filled, unchanging information that applies to all assets using this template.
Configuring Data Fields
When you click "Add Input" under either Dynamic Data or Static Data sections, a modal form appears with the following configuration options:
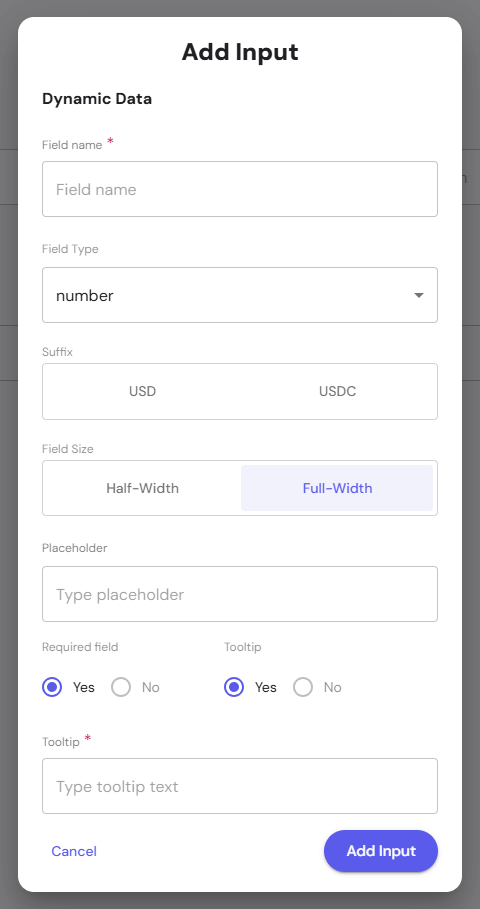
Field Configuration Options:
Field Name (Required)
Enter a descriptive name for your data field that will be displayed to users.
Field Type
Select the data type from the dropdown menu (text, number, date, etc.).
Suffix
Add optional suffix indicators like USD or USDC for currency fields.
Field Size
- Half-Width: Takes up half the available space (two fields per row)
- Full-Width: Takes up the full available space (one field per row)
Placeholder
Add helpful placeholder text that appears inside the empty field to guide users.
Required Field
Toggle between Yes and No to make the field mandatory.
Tooltip
When enabled, allows you to add explanatory text that appears when users hover over an info icon.
Form Actions:
- Cancel: Closes the modal without saving changes
- Add Input: Saves the field configuration and adds it to your template
This form allows you to create customized data fields that will be presented to users when they create assets using your template.
Step 3: Creating Assets from Templates
Once your template is configured and saved, you can use it to create actual assets.

Asset Creation Workflow
The asset creation process follows a structured 4-phase workflow visible in the left sidebar:
- Fill Data - Complete all asset-specific information
- Tokenization settings - Configure blockchain parameters
- Verification (optional) - Submit for third-party verification
- Minting - Deploy the asset as tokens on the blockchain
Data Phase 1: Fill Data Phase
In this phase, you'll complete both the core asset information and the template-specific fields you configured:
Core Asset Information:
- Asset Name: Enter a unique identifier for this specific asset
- Asset Ticker: Create a short symbol (like a stock ticker) for the asset
- Asset Category: Select from the dropdown menu to categorize your asset type
Dynamic Data Fields: These are the customizable fields you defined in your template. In our Real Estate example:
- Property Address: Enter the full street address of the property (required field with tooltip guidance)
- Monthly Rental Income: Enter the monthly rental amount in USD (required field)
Static Data Fields: These fields display the pre-filled information from your template and cannot be modified:
- Investment Value: Shows the fixed value (e.g., $2,850,000 USD)
- Building Type: Displays the pre-set building type (e.g., "Commercial Office")
Data Phase 2: Tokenization Settings
In the Tokenization Settings phase, you configure the blockchain parameters that will govern how your asset operates as digital tokens:
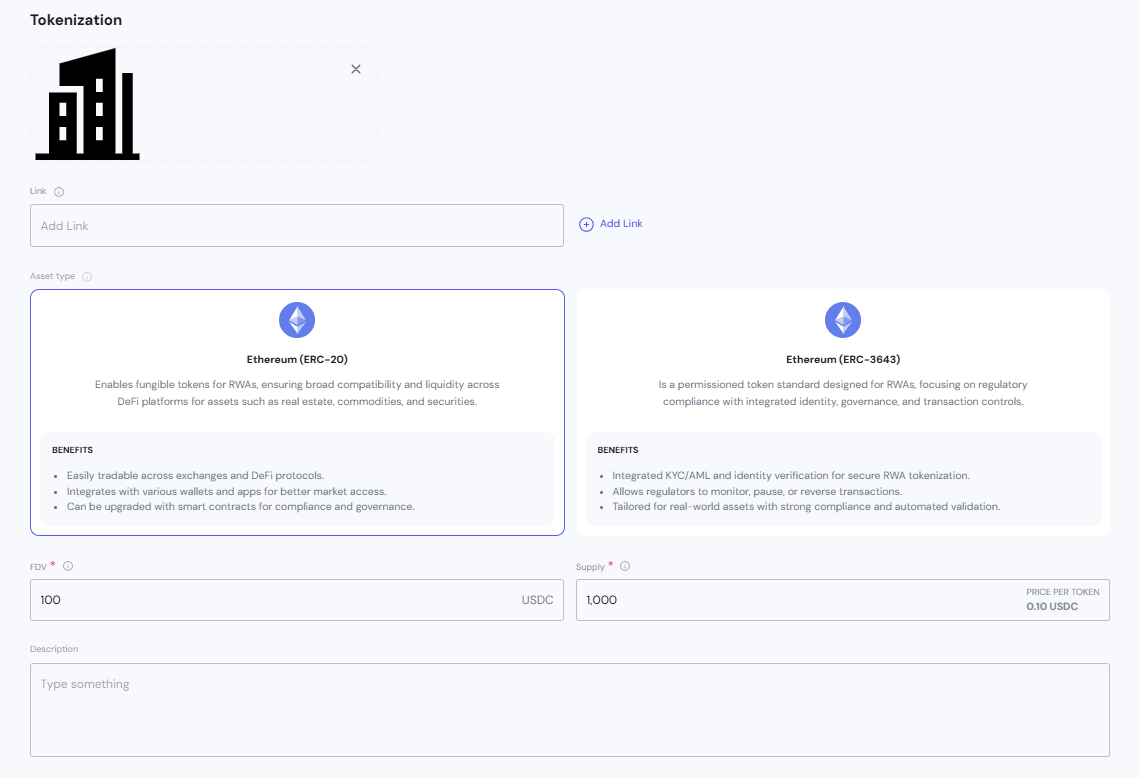
Asset Representation:
- Asset Icon: Upload or select a visual representation for your tokenized asset
- Link: Add a reference URL that provides additional context or discussion about the asset
Token Standard Selection: Choose between available Ethereum token standards:
When creating assets, you can choose between ERC-20 (fungible tokens) and ERC-3643 (permissioned security tokens).
| Feature | ERC-20 | ERC-3643 |
|---|---|---|
| Type | Fungible token standard | Permissioned security token standard |
| Use Case | General utility tokens, stablecoins, fungible asset representations | Regulated financial instruments, tokenized securities |
| Access Control | Open — anyone can hold and transfer | Permissioned — requires KYC/AML checks before holding or transferring |
| Compliance | No built-in compliance layer | Built-in compliance to support securities regulations |
| Flexibility | Simple, widely adopted | Advanced, designed for compliant tokenization |
| Best For | Liquidity, payments, rewards, basic fungible assets | Regulated assets, investor compliance, security tokens |
Tip:
- Use ERC-20 when you need broad accessibility and simplicity.
- Use ERC-3643 when compliance with financial regulations is required.
Token Economic Configuration:

- FDV: Fully Diluted Valuation in USDC. FDV is calculated as token price × total supply and represents the total value of the asset if all tokens were in circulation.
- Supply: The total number of tokens that will ever exist. The price per token is automatically calculated as FDV ÷ Supply.
- Price per Token: Automatically calculated and displayed in the UI as FDV ÷ Supply. This value updates dynamically as FDV or Supply changes.
Asset Description: Provide a comprehensive description of the tokenized asset, including investment highlights, key features, and value proposition for potential token holders.
The interface displays the specific benefits of each token standard to help you select the most appropriate option for your asset type and regulatory requirements. Each standard offers different capabilities for trading, compliance, and governance.
Data Phase 3: Verification (Optional)
The Verification phase is an optional step that allows you to submit your asset for third-party validation to enhance credibility and investor confidence.
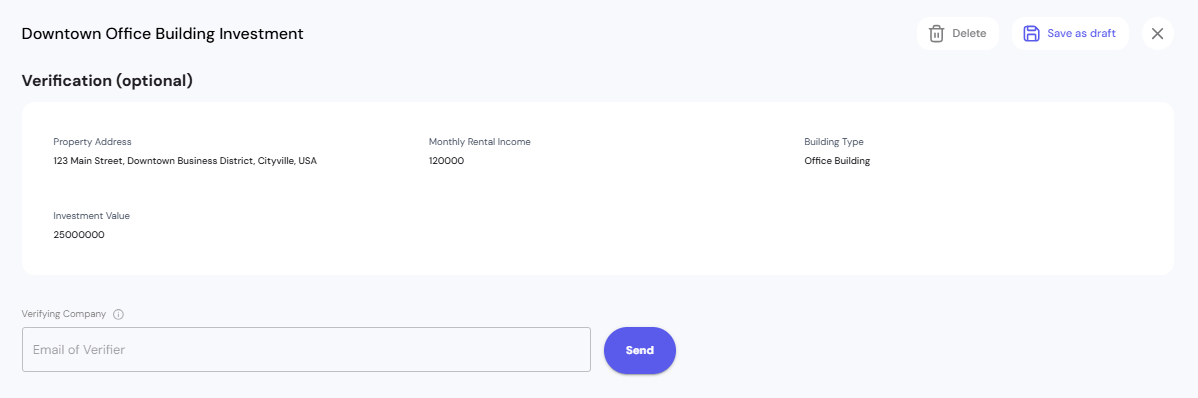
Asset Summary Review: Before proceeding with verification, the system displays a summary of your asset data for final review.
Verification Process:
- Verifying Company: Enter the email address of your chosen third-party verification provider
- Send: Submit your asset information to the verification company for review

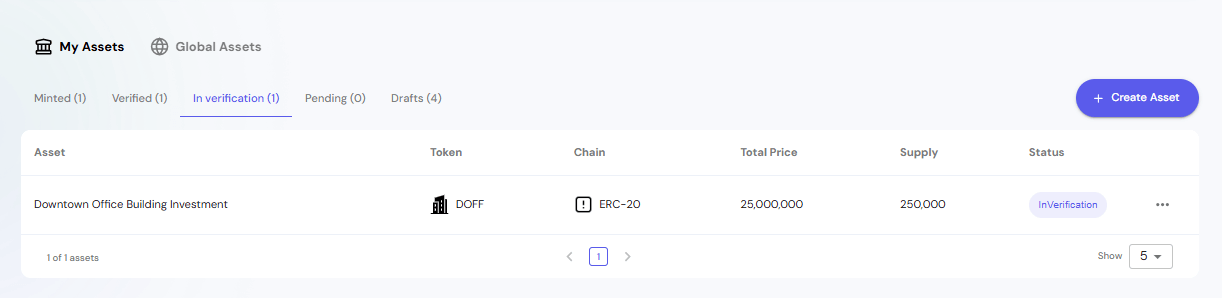
Dashboard Tracking: Once submitted, your asset appears in the dashboard under In verification status, allowing you to monitor the verification progress.
Verification Notification: The verification company receives an automated email notification with the subject "Request for audit" containing:
- Complete asset information summary
- All dynamic and static data fields
- Asset files and documentation
- A "Continue" button to access the detailed audit interface

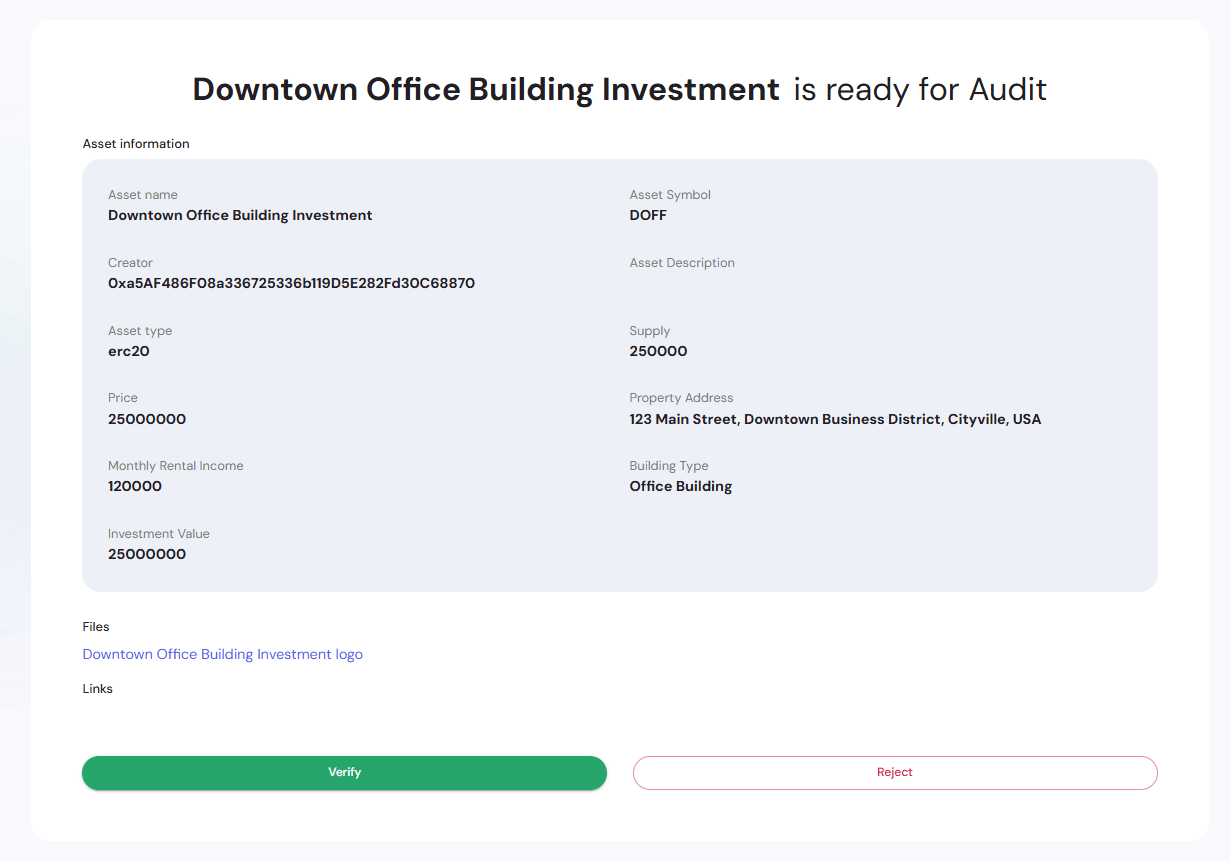
Verifier Review Interface: The verification company accesses a dedicated audit interface showing:
- Complete asset details including creator wallet address
- Asset type and token standard (e.g., ERC-20)
- All financial information and details
- Uploaded files and reference links
- Verify or Reject action buttons
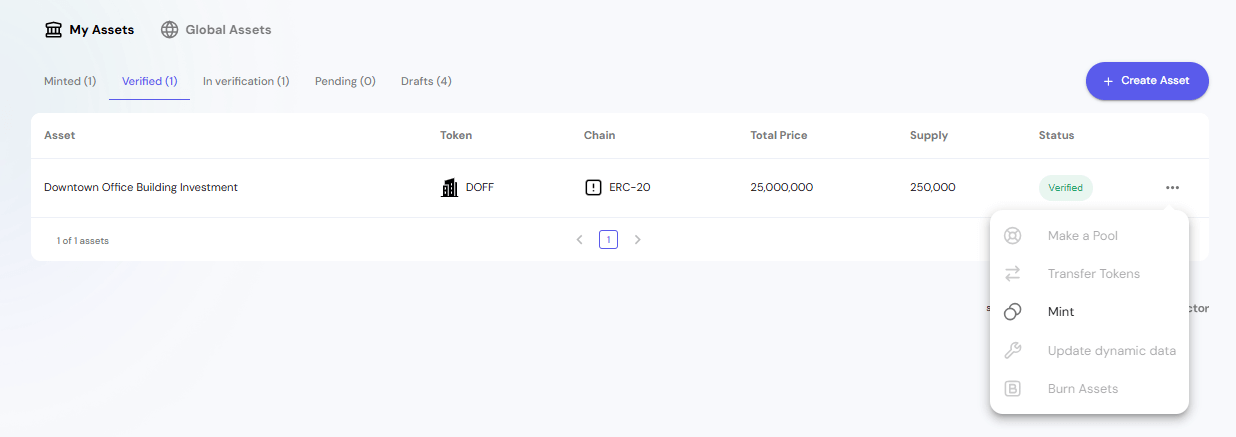
Verification Results: After review, assets move from "In verification" to Verified (1) in your dashboard:
- Verified: Assets that have passed verification
- Status shows as "Verified" with green indicator
- Verified assets gain enhanced credibility in the marketplace
Purpose of Verification:
- Provides independent validation of asset information and valuation
- Enhances investor trust and confidence in the tokenized asset
- May be required for certain regulatory compliance requirements
- Adds credibility to your asset offering in the marketplace
Once verification is complete, the asset is ready for the final minting phase to deploy on the blockchain.
Data Phase 4: Minting
The final phase in the asset creation workflow deploys your verified asset as tokens on the blockchain through a structured 4-step process:
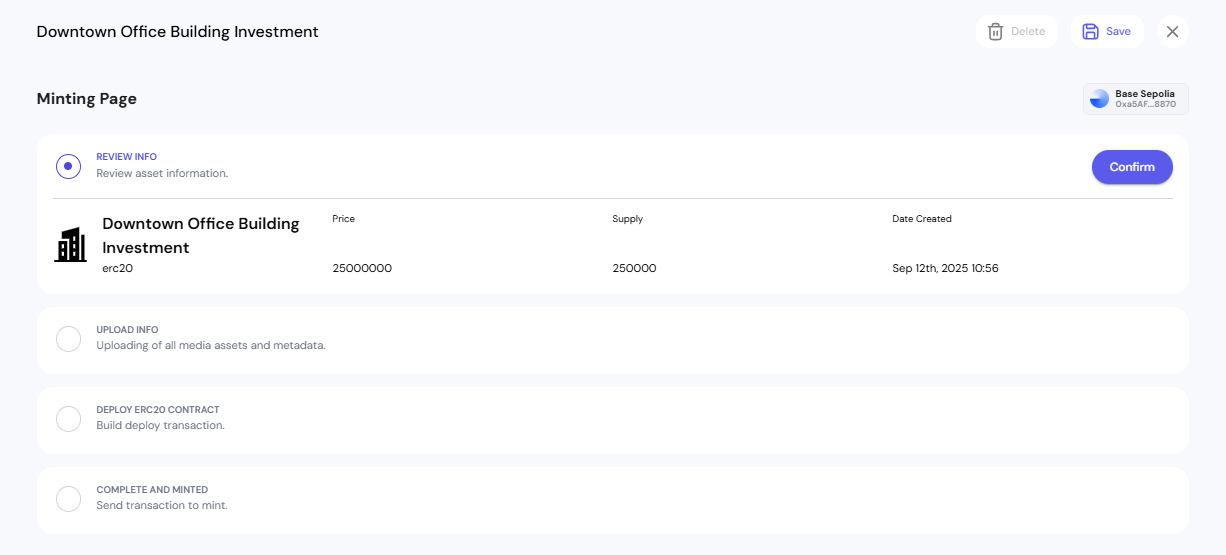
Minting Workflow Steps:
Step 1: Review Info
- Final review of all asset information including FDV, supply, and creation date
- Displays asset summary with token details
- Confirm button to proceed to next step
Step 2: Upload Info
- Upload all media assets and metadata to decentralized storage
- Upload button initiates the process of storing asset files and information
- Ensures asset data is permanently accessible on the blockchain
Step 3: Deploy ERC20 Contract
- Build and deploy the smart contract transaction to the blockchain
- Deploy button executes the contract deployment
- Creates the underlying token infrastructure on the selected blockchain network
Step 4: Complete and Minted
- Send the final transaction to mint the tokens
- Mint button completes the tokenization process
- Transforms your asset into tradeable digital tokens
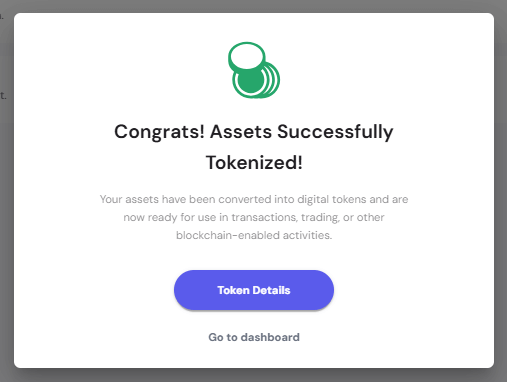
Successful Completion: Upon successful minting, you receive a confirmation modal stating "Congrats! Assets Successfully Tokenized!" with options to view Token Details or Go to dashboard.
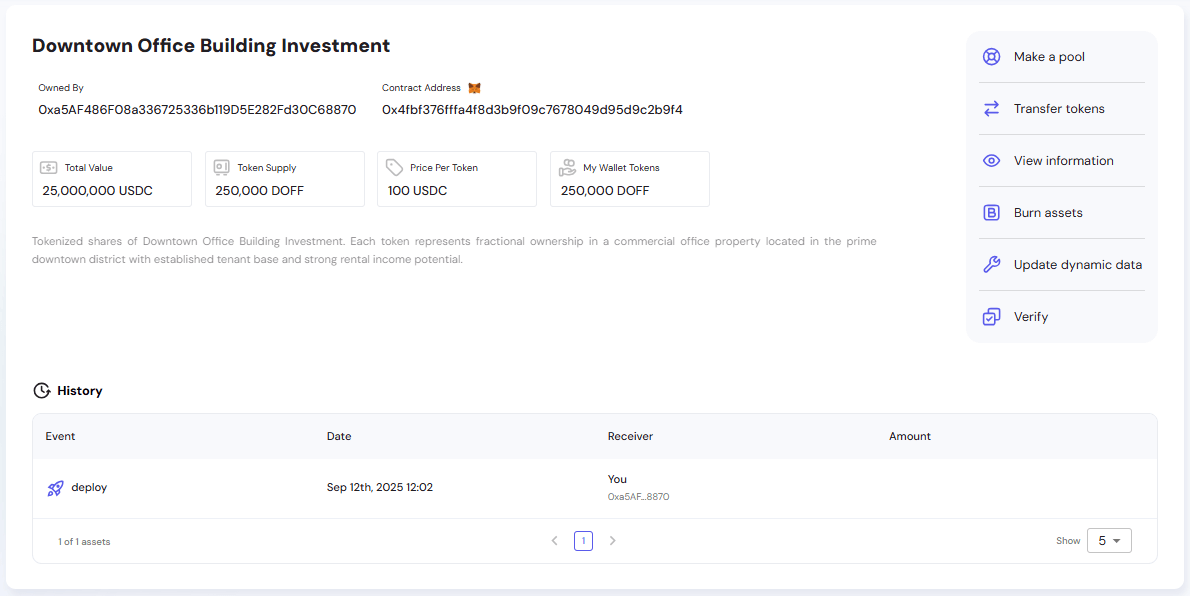
Post-Minting Asset Management:
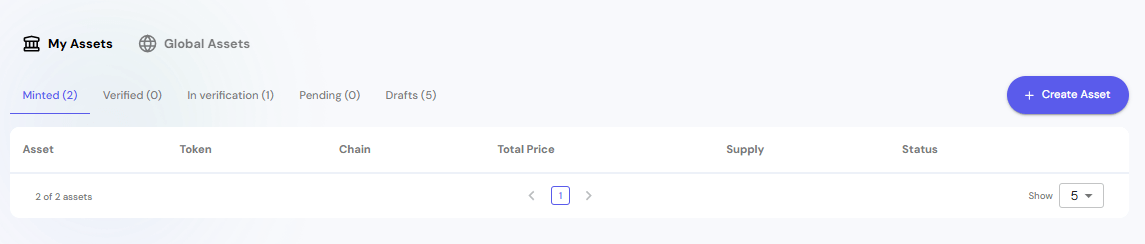
Once minted, your asset appears in the dashboard under Minted status and includes:
- Complete token information and contract addresses
- Transaction history showing deployment events
- Management options like token transfers, pool creation, and asset verification
The minting process finalizes your asset's transformation from a physical or digital asset into blockchain-based tokens, making them ready for trading, fractional ownership, or other DeFi activities.
Saving Work in Progress
At any point during the asset creation process, you can save your work as a draft to continue later.
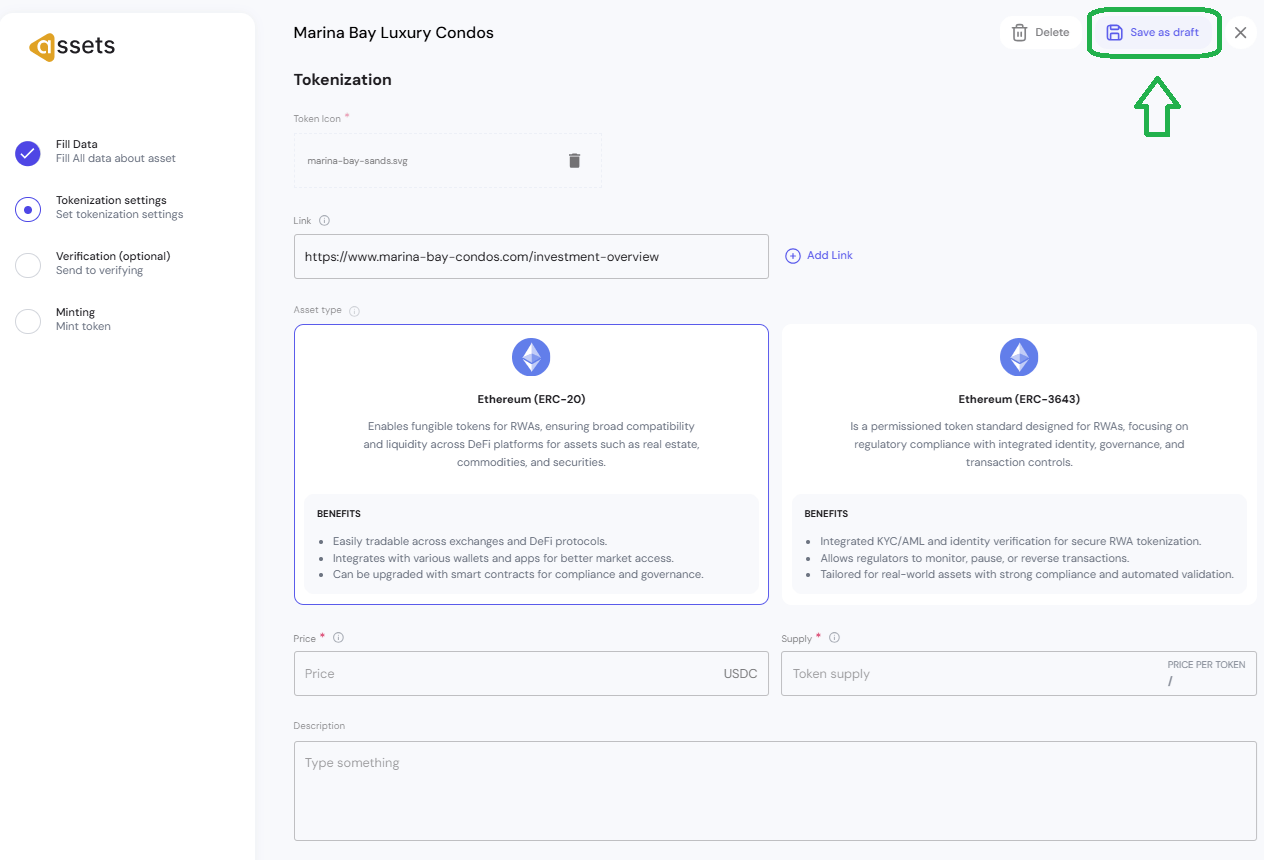
Save as Draft Feature:
- Click "Save as Draft" button available in the top-right corner of any phase
- Your progress is automatically saved and can be resumed later
- Drafted assets appear in your dashboard under the Drafts section for easy access
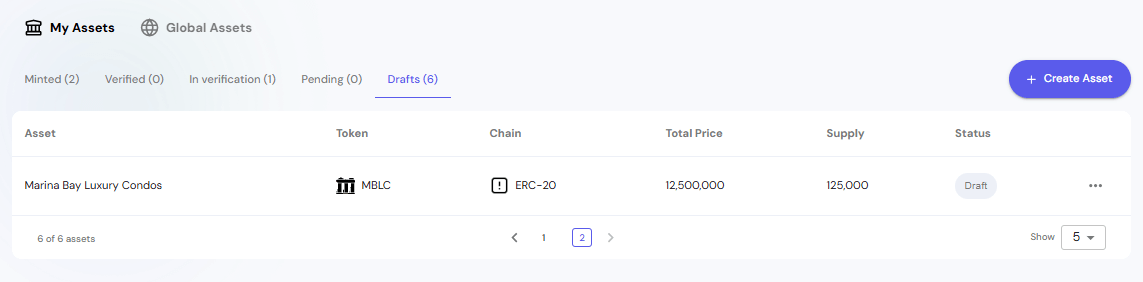
Managing Draft Assets:
- Access saved drafts from your main dashboard under Drafts tab
- Each draft shows the asset name, token details, FDV, supply, price per token and current status.
This flexibility allows you to work on complex assets over multiple sessions, collaborate with team members for review, or pause the process while gathering additional information or approvals.
Delete Assets
Assets can be deleted at certain stages of the creation process, with important restrictions based on their current status.
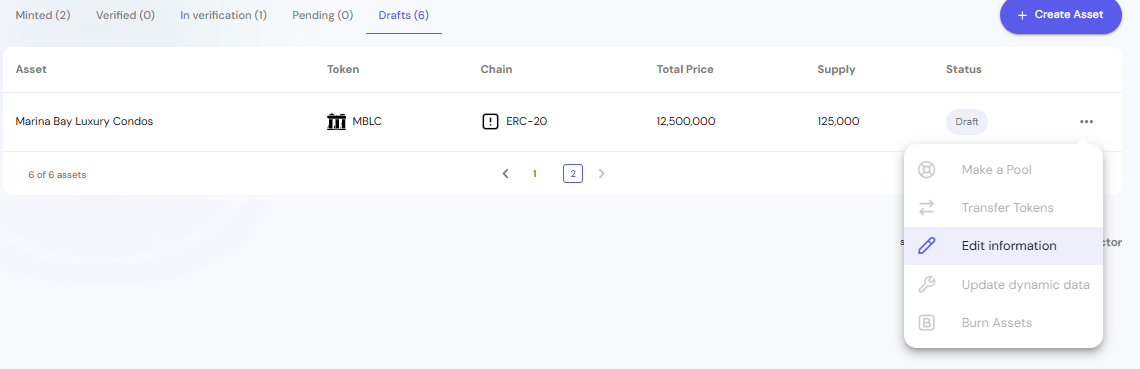
How to Delete:
- Use the action menu (⋯) and Edit information in the dashboard to delete draft assets
- Click the Delete button in the top-right corner of the asset creation interface
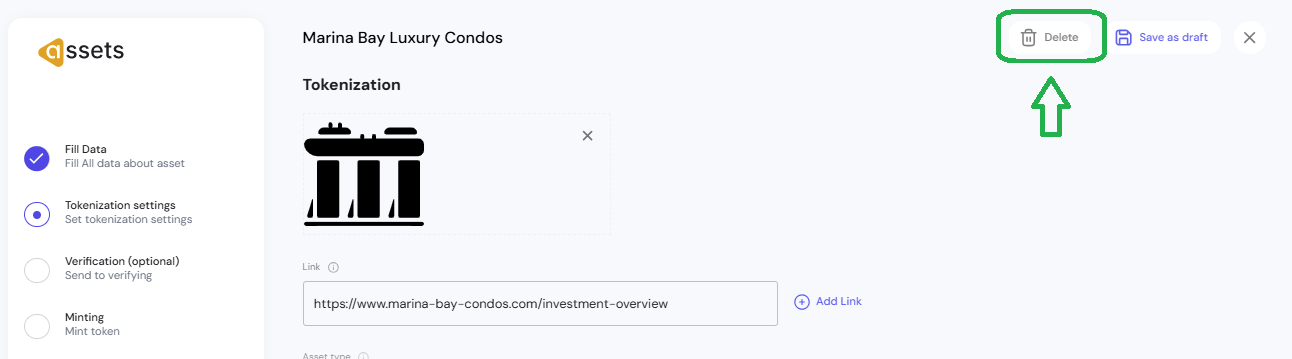
Deletion Availability:
- Draft Assets, Pre-Verification: Assets can be deleted during these phases
- In Verification: Once an asset is submitted for verification, it cannot be deleted
- Verified and Minted: Assets in these final stages cannot be deleted
